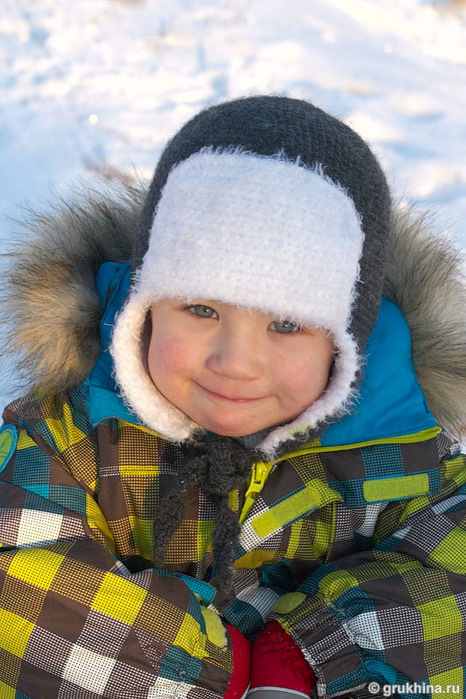
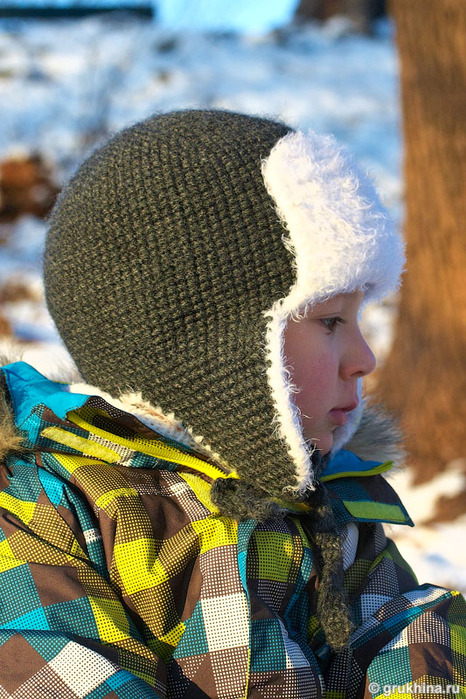
DOUBLE SHAPKA-USHANKA HOOK. |
Children's double-layer knitted hat with earflaps. Description of crochet.
It is a comfortable, practical and very warm crocheted ear-flap. It fits perfectly on the head and warms even in the most severe colds, and if it is not very cold outside, you can tie the ears of the caps on the crown or on the back of the head.
The knitting complexity of this model is low, in other words, even the one who is just beginning to learn crochet can knit such a hat.
The knitting complexity of this model is low, in other words, even the one who is just beginning to learn crochet can knit such a hat.
To crochet fur caps, we need (head circumference - 52 cm):
- gray yarn for outer caps - 50-70 gr.
(I used the yarn without a label, a possible composition - acrylic + wool, approximate footage, 50 g. = 100-130 m.);
- yarn of white (or any other) color for the inner cap (I used Schachenmayr Idena Plus acrylic yarn, 100% acrylic, 50 g. = 133 m.) - approx. 50 gr.
- a little yarn "Lotus Grass Traytch";
- hook number 4;
Knitting description:
Before starting knitting, I recommend to calculate the maximum diameter of the bottom of the cap, based on the circumference of the baby’s head:
From the formula for the circumference, C = 2πR = πD, where C is the circumference, R is the radius, D is the diameter, π is the constant Pi (3 , 14), we obtain D = C / π
In my case, with a head circumference of C = 52 cm. The maximum diameter is D = 52 / 3.14 = 16.56 cm.
Notation used:
vp - air loop sbn - column without nakid
psn - half column with nakida
ss - connecting column
Increase - 2 columns without nakid in one loop
1. Knit the outer cap:
1 row: 2 VP, close into a ring, then knit in a circle 6 sbn [= 6]
2 row: 6 increments [= 12]
3 row: (increase, 1b) * 6 times [= 18]
4 row: (increase, 2b) * 6 times [= 24]
5 row: (Increase, 3b) * 6 times [= 30]
6 row: (Increment, 4b) * 6 times [= 36]
7 row: (Increment, 5b) * 6 times [= 42]
8 row: (Increase, 6sbn) * 6 times [= 48]
9 row: (Increase, 7sbn) * 6 times [= 54]
10 row: (Increment, 8sbn) * 6 times [= 60]
11 Row: (Increase, 9b) * 6 times [= 66]
12 Row: (Increase, 10b) * 6 times [= 72]. We get a circle with a diameter of approx. 11 cm.
Next, knit with increments through row
13 row: 72sbn [= 72]
14 row: (Increment, 11sbn) * 6 times [= 78]
15 row: 78sbn [= 72]
16 row: (Increase, 12b) * 6 times [= 84]
We get a circle with a diameter of 16.5 cm - this is the maximum cap diameter for a head circumference of 52 cm (see the calculation above).
Next, knit without increases to the required length of the cap (approximately to the level of the eyebrows):
17-36 rows (20 rows): 84sbn [= 84]
Next, we conventionally divide the 84 columns of the crown into 4 parts: 24 columns each on the front and back parts of the cap, and 18 columns on the ears and to form the ears and the back (more in-depth) part of the cap we move from circular knitting to knitting with front and back rows .
Please note that at this stage it is necessary to start forming bevels of ears, for this I recommend first reading the advice below.
Please note that at this stage it is necessary to start forming bevels of ears, for this I recommend first reading the advice below.
1 (front) row: we knit the columns of one “ear”, then the back columns and the columns of the second “ear” 18 + 24 + 18 = 60 sat [= 60]
2 (wrong) row: 60 ss for one half-loop of the columns of the previous row.
Please note that all purl rows are necessary to return to the beginning of the previous facial row without tearing the thread.
3 (front) row: we knit in the same way as the first row, introducing a hook between the columns of the 1st row and not tying 1 column on each side to form a bevel. 17 + 24 + 17 = 58 sat [= 58]
4 (purl) row: 58 ss for one half-loop of the columns of the previous row.
5 (front) row: we knit in the same way as the first row, introducing a hook between the columns of the 3rd row. not connecting 1 pillar on each side to form a bevel 16 + 24 + 16 = 56 Bs [= 56]
Tip: for the formation of bevels in both sides of the ears at the beginning and at the end of each row, it is necessary to mismatch 1 pillar.
To do this, I recommend:
- at the beginning of each front row, do not knit the lift air loop, but start knitting straight from the single crochet column and insert the hook into the hole between the columns of the previous row, which is slightly to the left of the loop on the hook, and not directly below it (t ... in the second interval of the previous front row),
- at the end of the front row, tie the last 2 loops together as follows:

- in the purl ranks air lift loops are also not needed. For the first connecting loop, it is necessary to insert a hook into the second loop from the hook, i.e. also in the second span of the previous row.
Next, we proceed to the formation of the ears, for this we continue to knit similarly to the straight and inverse rows only on the loops of one ear to the desired length (in my case each ear consists of 14 front rows).
Do not forget to form bevels on both sides.
After the first eyelet is completely knitted, we form a thread and, similarly, we knit the second eyelet.
2. Similarly, knit the inner cap of acrylic or other soft yarn. I recommend in the process of knitting to put the inner cap into the outer cap to check the conformity of their sizes.
It may happen that, due to the difference in yarn thickness, the inner cap may turn out wider than the outer cap, or, conversely, significantly narrower. In this case, it is necessary to reduce / increase the number of loops, at the stage of forming the donushk cap.
It may happen that, due to the difference in yarn thickness, the inner cap may turn out wider than the outer cap, or, conversely, significantly narrower. In this case, it is necessary to reduce / increase the number of loops, at the stage of forming the donushk cap.
Having reached the stage of tying the ears of the inner cap, we turn to knitting with yarn "Lotus Travka Stretch". It is necessary that the inner side of the ears was fluffy - so in my opinion it turns out warmer and prettier.
3. When both hats are knitted, we put one into the other and join them together, tying all over the bottom edge (including the ears) with single crochets, using “Lotus Travka Stretch” yarn.
We sew the crown (start of knitting) of caps together with several hidden stitches.
We sew the crown (start of knitting) of caps together with several hidden stitches.
4. We knit the visor with columns without nakida with facial and purl rows. Knit to the desired length. Then we sew a visor to the cap with hidden stitches.
5. We knit strings: on the central loops of the lower edge of each ear, we knit 4 columns without single crochet. Next, knit facial and purl rows of 4 sbn in each row to the desired length.
Please note that the strings in the process of socks are stretched, so I recommend knitting them in a tighter manner.
Please note that the strings in the process of socks are stretched, so I recommend knitting them in a tighter manner.
Tip: to "fluff" the items connected from the yarn Lotus Travka Streych, you can use the tape, "Velcro", or rather the part that consists of small hooks.
Knitted hat with earflaps ready!


0 Commentaires